Thursday, March 1, 2012

Velveeta Cheese Box 'Art'

Cheesy Craft

My family likes to make bean dip.  Now that Velveeta has a white cheese they are even more addicted.  I was ummm, cutting the cheese the other day and getting ready to toss another box into the trash.  All of the sudden an idea hit me....the bottom part of the Velveeta box could be painted and used for some sort of craft.  Here's what I came up with...

First we start with the bottom part of the cheese box.


Next, using a  foam brush, paint brush or even spray paint, paint the entire outside of box.  *Picture is taken in my basement kitchen.  : )


Since I used black, I needed a lighter colored sticker.  I used silver stickers that I scrapbook with. 


Tuesday, February 21, 2012

Decorative Box Facelift

EASY - Boxes that I've had for years received a facelift. 

After

Before

Directions:

Use acrylic paint (even spray paint) and cover the lid and box. Allow to dry.

Since I used black paint I needed a brighter color to trim the edges with.  I used silver ink for stamping  with a small sponge.  Mind was a craft sponge, but even a rag bunched together will work.  Just dab all of the edges and corners of lid and box.  Let dry. 

I popped the stem off of a fake slower and hot glued it onto the box.  (Make sure you only glue the flower on the lid or box.)

Since my box has a handle I used a piece of leftover hem from my kitchen curtain and tied a bow.


Making Use of Old Spaces

Built-in microwave cabinet makes a great TV shelf!!!


Recycled Night Light

Glass Jar + Pinecones + Christmas Lights = Fun Night Light


I don't know the specifis of this craft because my father-in-law made them for my daughters.  I do know that the pinecones were sprayed with glue and sprinkled with glitter.  It appears that the light strand is a 20 count.  The lid is screwed to a metal plate that was painted red.  The jar looks to be about 1 gallon.


Kitchen Plate Craft

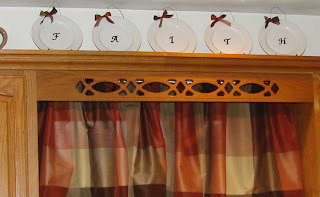
Faith Display


Cheap & EASY Display


Items Needed:
Salad Plates - one plate per letter - these came with my dishes many moons ago and were seldom used
Stickers - bought at Archivers for scrapbooking
Floral Wire  - floral section at Walmart 
Plate Stands - one per plate
Ribbon to make the bows - I saved some scraps from my curtain hemming
Hot Glue Gun / Glue Stick

Directions:
Place a letter sticker in the center of each plate and press smoothly
Snip a piece of floral wire to desired length and hot glue onto the back
Snip a piece of ribbon and tie one bow onto each piece of wire
Place each plate in plate stand


Cardboard Box Craft


Cardboard Box Monogram Craft


This craft is SUPER easy...even for the extremely craft challenged!  You only need a couple of items and VIOLA!
Items Needed:
Cardboard Box or Lid - (I used a flat/case that held 12 soup cans)
Base Paint Color (I used treehouse green that matches my accent wall in the kitchen)
Accent Paint Color (I used acrylic black in gloss)
Cheap Foam Brush (available at Walmart for under a $1)
Cardstock to print Font on OR vinyl letter
Scissors
Elmer's Glue Mixed with Water (3/4 glue to 1 part water)

Directions:
First paint the box the color of your choice & let dry
Add another coat if needed & let dry
Clean Brush or Use Separate One
Dip tip of brush in accent color and dab along the edges of box to create a border & let dry
Select your cardstock for the monogram.  In MS Word I used a fancy font and printed an 'R' at 400%.  (The 'F' box holds 24 soup cans so the font is at 800%) Then I cut it out with scissors.  I then painted the 'R' in the same black accent color and let it dry.  Once dry, use your clean brush and apply an even amount of glue and place on box.  Finally,  coat the top and sides of the box in the glue to seal it.  Let dry and display